数据加载及处理
Ascend GPU CPU 入门 数据准备
![]()
![]()
![]()
![]()
MindSpore提供了部分常用数据集和标准格式数据集的加载接口,用户可以直接使用mindspore.dataset中对应的数据集加载类进行数据加载。数据集类为用户提供了常用的数据处理接口,使得用户能够快速进行数据处理操作。
数据准备
以下示例代码将CIFAR-10数据集和MNIST数据集下载并解压到指定位置。
[1]:
import os
import requests
import tarfile
import zipfile

requests.packages.urllib3.disable_warnings()

def download_dataset(url, target_path):
    """下载并解压数据集"""
    if not os.path.exists(target_path):
        os.makedirs(target_path)
    download_file = url.split("/")[-1]
    if not os.path.exists(download_file):
        res = requests.get(url, stream=True, verify=False)
        if download_file.split(".")[-1] not in ["tgz", "zip", "tar", "gz"]:
            download_file = os.path.join(target_path, download_file)
        with open(download_file, "wb") as f:
            for chunk in res.iter_content(chunk_size=512):
                if chunk:
                    f.write(chunk)
    if download_file.endswith("zip"):
        z = zipfile.ZipFile(download_file, "r")
        z.extractall(path=target_path)
        z.close()
    if download_file.endswith(".tar.gz") or download_file.endswith(".tar") or download_file.endswith(".tgz"):
        t = tarfile.open(download_file)
        names = t.getnames()
        for name in names:
            t.extract(name, target_path)
        t.close()
    print("The {} file is downloaded and saved in the path {} after processing".format(os.path.basename(url), target_path))

download_dataset("https://mindspore-website.obs.cn-north-4.myhuaweicloud.com/notebook/datasets/cifar-10-binary.tar.gz", "./datasets")
download_dataset("https://mindspore-website.obs.cn-north-4.myhuaweicloud.com/notebook/datasets/MNIST_Data.zip", "./datasets")
CIFAR-10数据集文件的目录结构如下:
./datasets/cifar-10-batches-bin
├── batches.meta.txt
├── data_batch_1.bin
├── data_batch_2.bin
├── data_batch_3.bin
├── data_batch_4.bin
├── data_batch_5.bin
├── readme.html
└── test_batch.bin
MNIST数据集文件的目录结构可参考初学入门。
加载数据集
下面的样例通过Cifar10Dataset接口加载CIFAR-10数据集,使用顺序采样器获取前5个样本。
[2]:
import mindspore.dataset as ds

DATA_DIR = "./datasets/cifar-10-batches-bin"
sampler = ds.SequentialSampler(num_samples=5)
dataset = ds.Cifar10Dataset(DATA_DIR, sampler=sampler)
迭代数据集
用户可以用create_dict_iterator创建数据迭代器,迭代访问数据,下面展示了对应图片的形状和标签。
[3]:
for data in dataset.create_dict_iterator():
    print("Image shape: {}".format(data['image'].shape), ", Label: {}".format(data['label']))
Image shape: (32, 32, 3) , Label: 6
Image shape: (32, 32, 3) , Label: 9
Image shape: (32, 32, 3) , Label: 9
Image shape: (32, 32, 3) , Label: 4
Image shape: (32, 32, 3) , Label: 1
自定义数据集
对于目前MindSpore不支持直接加载的数据集,可以构造自定义数据集类,然后通过GeneratorDataset接口实现自定义方式的数据加载。
[4]:
import numpy as np

np.random.seed(58)

class DatasetGenerator:
    def __init__(self):
        self.data = np.random.sample((5, 2))
        self.label = np.random.sample((5, 1))

    def __getitem__(self, index):
        return self.data[index], self.label[index]

    def __len__(self):
        return len(self.data)
其中用户需要自定义的类函数如下:
__init__
实例化数据集对象时,
__init__函数被调用,用户可以在此进行数据初始化等操作。def __init__(self): self.data = np.random.sample((5, 2)) self.label = np.random.sample((5, 1))
__getitem__
定义数据集类的
__getitem__函数,使其支持随机访问,能够根据给定的索引值index,获取数据集中的数据并返回。其中
__getitem__函数的返回值,需要是由numpy数组组成的元组(tuple),当返回单个numpy数组时可以写成return (np_array_1,)。def __getitem__(self, index): return self.data[index], self.label[index]
__len__
定义数据集类的
__len__函数,返回数据集的样本数量。def __len__(self): return len(self.data)
定义数据集类之后,就可以通过GeneratorDataset接口按照用户定义的方式加载并访问数据集样本。
[5]:
dataset_generator = DatasetGenerator()
dataset = ds.GeneratorDataset(dataset_generator, ["data", "label"], shuffle=False)

for data in dataset.create_dict_iterator():
    print('{}'.format(data["data"]), '{}'.format(data["label"]))
[0.36510558 0.45120592] [0.78888122]
[0.49606035 0.07562207] [0.38068183]
[0.57176158 0.28963401] [0.16271622]
[0.30880446 0.37487617] [0.54738768]
[0.81585667 0.96883469] [0.77994068]
数据处理及增强
数据处理
MindSpore提供的数据集接口具备常用的数据处理方法,用户只需调用相应的函数接口即可快速进行数据处理。
下面的样例先将数据集随机打乱顺序,然后将样本两两组成一个批次。
[6]:
ds.config.set_seed(58)

# 随机打乱数据顺序
dataset = dataset.shuffle(buffer_size=10)
# 对数据集进行分批
dataset = dataset.batch(batch_size=2)

for data in dataset.create_dict_iterator():
    print("data: {}".format(data["data"]))
    print("label: {}".format(data["label"]))
data: [[0.36510558 0.45120592]
 [0.57176158 0.28963401]]
label: [[0.78888122]
 [0.16271622]]
data: [[0.30880446 0.37487617]
 [0.49606035 0.07562207]]
label: [[0.54738768]
 [0.38068183]]
data: [[0.81585667 0.96883469]]
label: [[0.77994068]]
其中,
buffer_size:数据集中进行shuffle操作的缓存区的大小。
batch_size:每组包含的数据个数,现设置每组包含2个数据。
数据增强
数据量过小或是样本场景单一等问题会影响模型的训练效果,用户可以通过数据增强操作扩充样本多样性,从而提升模型的泛化能力。
下面的样例使用mindspore.dataset.vision.c_transforms模块中的算子对MNIST数据集进行数据增强。
导入c_transforms模块,加载MNIST数据集。
[7]:
import matplotlib.pyplot as plt
from mindspore.dataset.vision import Inter
import mindspore.dataset.vision.c_transforms as c_vision
DATA_DIR = './datasets/MNIST_Data/train'
mnist_dataset = ds.MnistDataset(DATA_DIR, num_samples=6, shuffle=False)
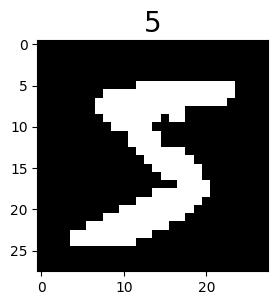
# 查看数据原图
mnist_it = mnist_dataset.create_dict_iterator()
data = next(mnist_it)
plt.figure(figsize=(3, 3))
plt.imshow(data['image'].asnumpy().squeeze(), cmap=plt.cm.gray)
plt.title(data['label'].asnumpy(), fontsize=20)
plt.show()
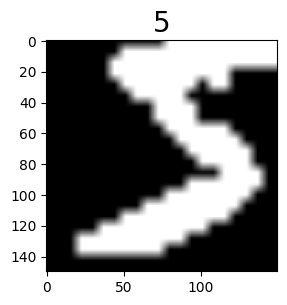
定义数据增强算子,对数据集进行Resize和RandomCrop操作,然后通过map映射将其插入数据处理管道。
[8]:
resize_op = c_vision.Resize(size=(200, 200), interpolation=Inter.LINEAR)
crop_op = c_vision.RandomCrop(150)
transforms_list = [resize_op, crop_op]
mnist_dataset = mnist_dataset.map(operations=transforms_list, input_columns=["image"])
查看数据增强效果。
[9]:
mnist_dataset = mnist_dataset.create_dict_iterator()
data = next(mnist_dataset)
plt.figure(figsize=(3, 3))
plt.imshow(data['image'].asnumpy().squeeze(), cmap=plt.cm.gray)
plt.title(data['label'].asnumpy(), fontsize=20)
plt.show()
想要了解更多可以参考编程指南中数据增强章节。